
The video is intended to supplement the full Instructions for Use included in the Patient Information Leaflet.
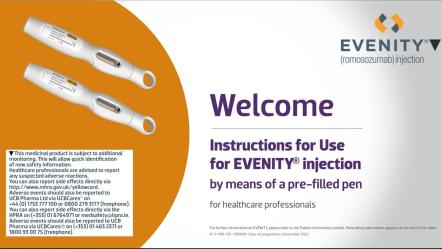
See the full instructions for use in the back of the Patient Information Leaflet for complete directions. Administration should be performed by an individual who has been trained in injection techniques.1
There is also a version of this video for your patients at:
How to Administer1 - A brief overview
For full administration instructions, select here
- Pre-filled pens should be left outside the refrigerator to reach room temperature for at least 30 minutes before injection (do not warm in any other way). This will make the injection more comfortable. You can keep it at room temperature (up to 25°C) for up to 30 days. If not used within this period the product should be discarded. Do not freeze. Keep the pre-filled pen in the outer carton in order to protect from light
- Clean the chosen injection site with an alcohol wipe
- Pull the white cap straight off just before the injection (do not twist or bend the white cap)
- DO NOT push down on the pre-filled pen until you’re ready to inject
- Push down the pre-filled pen until the yellow safety guard stops moving. When you hear a click, the injection will begin and may take about 15 seconds. When the injection is complete, the viewing window will turn fully yellow and you may also hear or feel a second click
- Once the pre-filled pen is removed from the skin, the needle will be automatically covered
- If the viewing window has not turned fully yellow, or if it looks as though the medicine is still injecting, it means you have not received a full dose. Your healthcare provider should be informed as soon as possible
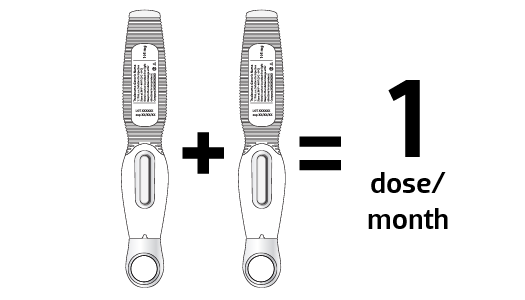
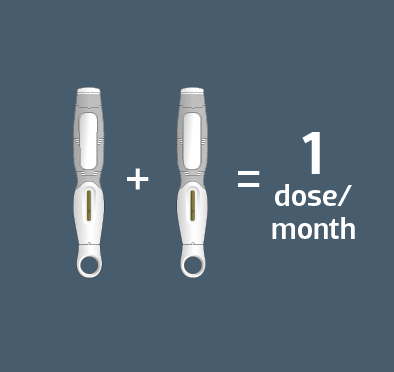
- Repeat all steps from the Patient Information Leaflet ‘Instructions for Use’ section for the second injection
- The second injection should not be administered at the exact same location used for the first injection
Step-by-step instructions for use are available in the Patient Information Leaflet
- Take the carton containing the two pre-filled pens out of the refrigerator
- Your pre-filled pens should be left outside the refrigerator to reach room temperature (up to 25°C) for at least 30 minutes before injection (do not warm in any other way). This will make the injection more comfortable
- Open the carton and gather all materials you need for the injection (as listed in Step B)
- Wash your hands thoroughly
- Lift the pre-filled pens straight up out of the carton - do not remove the white caps from the pre-filled pens yet
- Do not shake the pre-filled pens
- Check the medicine through the viewing window. The medicine should be a clear to opalescent, colourless to light yellow solution
- Do not use the pre-filled pens if the solution is discoloured, cloudy, or contains flakes or particles.
- You may see air bubbles. Injecting the solution subcutaneously (under the skin) which contains air bubbles is harmless - Do not use the pre-filled pens if:
- it has been dropped;
- the white cap is missing or not securely attached;
- the seal is missing or broken or if any other part appears cracked or broken.
In such case, use a new pen and contact your doctor as soon as possible.
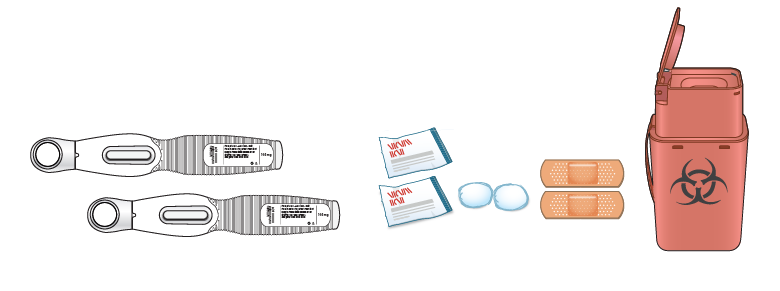
On a clean, well-lit work surface, place:
- two pre-filled pens
- two alcohol wipes
- two cotton balls or gauze pads
- two adhesives bandages
- special disposal container
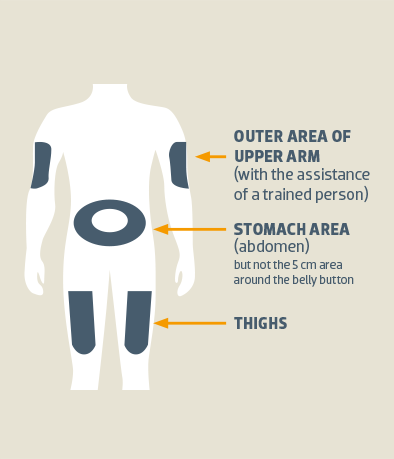
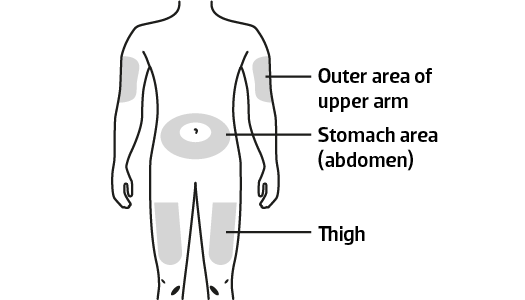
Prepare and clean the skin where you are going to inject the medicine. You can choose from:
- The thighs or
- The stomach area (abdomen), but not the 5 cm area around the belly button or
- The outer area of upper arm (if someone else is giving you the injection)
- The second injection should be given at a different site from the one used for the first injection. If you wish to use the same injection site, make sure it is not the exact same injection spot
- Do not inject into areas where the skin is tender, bruised, red, hard, has scars, or stretch marks, or has raised thick, red, or scaly skin patches or lesions
- Clean the area you are going to inject with an alchohol wipe. Let the skin dry before the injection

- Do not touch this area again before injecting
- Pull the white cap straight off just before the injection
- Once the cap is removed, the injection must be given within 5 minutes. There is no need to rush the
injection - 5 minutes is enough time
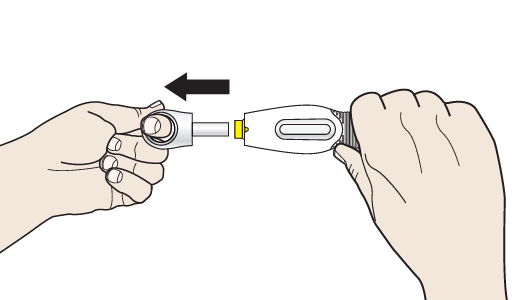
- Do not twist or bend the white cap
- Discard the white cap in the special disposal container. Do not place the white cap back onto the pre-filled pen
- Although hidden from view, the needle tip is now uncovered. Do not try to touch the needle as it could activate the pre-filled pen. It is normal to see a drop of liquid at the end of the needle (Inside the yellow safety guard)
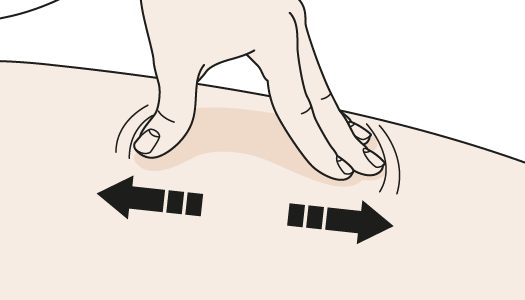
Stretch or pinch the injection site to create a firm surface
Stretch method
- Stretch the skin firmly by moving thumb and fingers in opposite directions, to create an area about
5 cm wide
or
Pinch method
- Pinch the skin firmly between thumb and fingers, to create an area about 5 cm wide
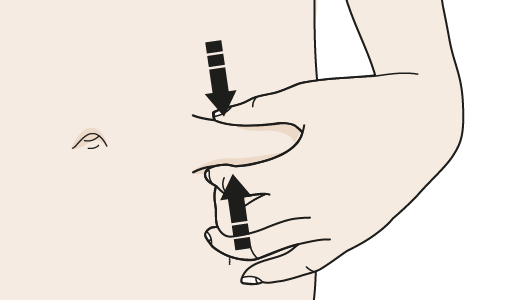
- Important: Keep the skin stretched or pinched while injecting
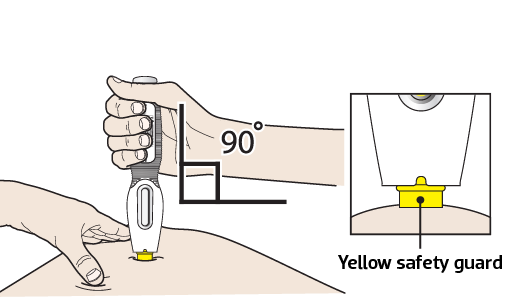
- Important: The pre-filled pen should not be pushed down until the actual injection is ready to be performed
- The stretch or pinch should be held. With the other hand, the pre-filled pen’s yellow safety guard should be placed down on the area of the skin that previously has been cleaned (the “injection site”) at a 90° angle
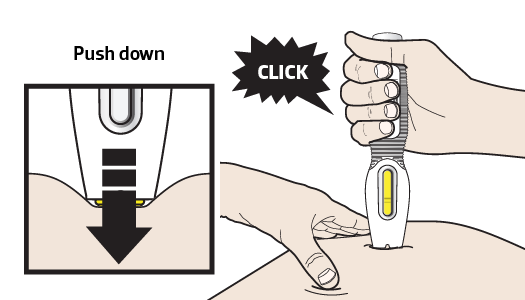
- The pre-filled pen should be firmly pushed down onto the skin until the yellow safety guard stops moving. When you hear or feel a click, the injection will begin
- Keep pushing down on the skin. The injection could take about 15 seconds
- When the injection is complete, the viewing window will turn fully yellow and you may also hear or feel a second click
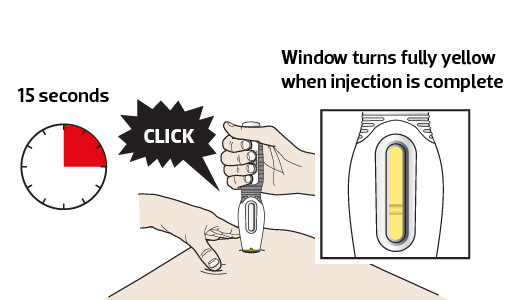
- The used pre-filled pen may now be removed by carefully pulling it straight up from the skin
- Important: When you remove the pre-filled pen, if the window has not turned fully yellow, or if it looks like the medicine is still injecting, this means the full dose has not been delivered. The healthcare provider should be informed as soon as possible
- After removing the pre-filled pen from the skin, the needle will be automatically covered. Do not try to touch the needle
- Discard the entire used pre-filled pen and the white cap in a special container straight away after use

- Do not throw away (dispose of) the pre-filled pen in the household waste
- Do not re-use the pre-filled pen
- Important: Always keep the special disposal container out of the sight and reach of children
If there is blood, use a cotton ball or a piece of gauze and apply light pressure over the injection site for a few seconds. Do not rub the injection site. The injection site can be covered with a small adhesive bandage, if necessary
Repeat all steps starting from step C with the second pre-filled pen to inject the full dose. The second injection should be given on a different site than the one used for the first injection. If you wish to use the same injection site, make sure it is not the exact same injection spot.